Steak & Cheese Sub Pictures
Will show you how to make this incredibly tasty steak cheese sandwich in our step by step guide below.
You'll need to toast the sub first before going on to cook the beef strips and adding the salad - in eleven simple steps.
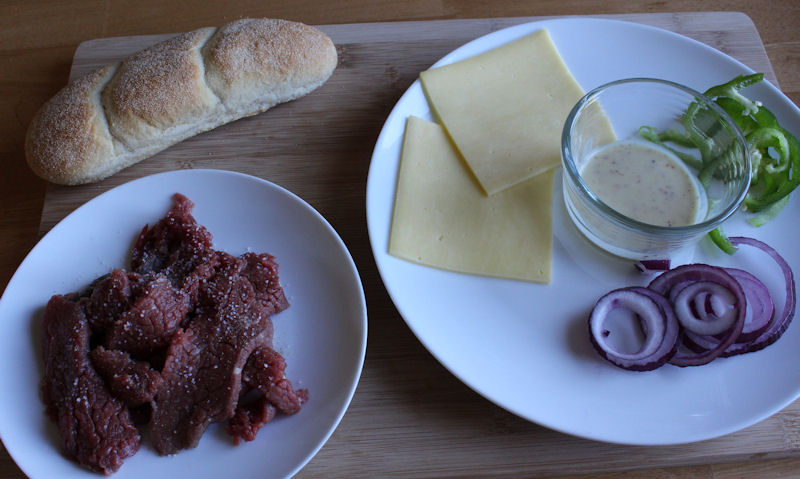
First thing you'll need is beef strips, and to make these you can cut them from your mum's roasting joint before she goes on to cook for the family.
If not you can buy a small roasting joint for very little.
All you need then is Cheddar slices, green pepper and red onion and a basic honey mustard dressing - we are using M&S plain white sub rolls.
To view an in-depth look at this sub, go to our steak and cheese sub recipe page with ingredients, instructions and nutritional information.
Step 1: Toasting Subs Rolls in Grill Pan
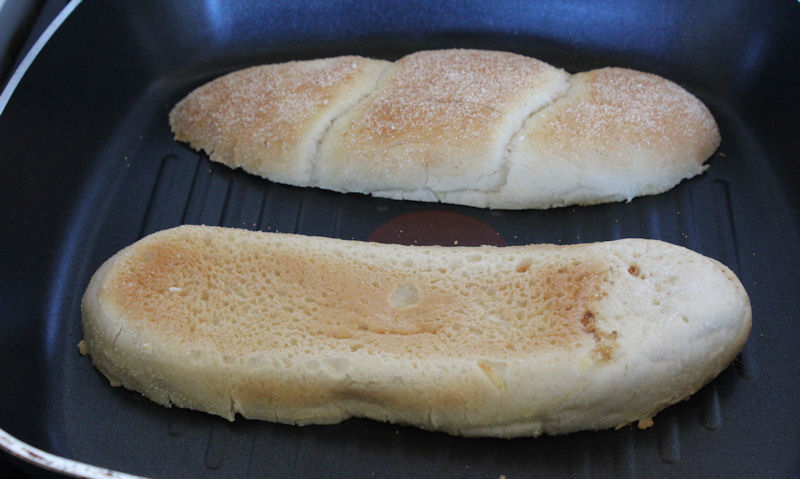
After buttering both sides of the cut open sub rolls, place face down in the pan and cook for up to 5 minutes until the flat surface is toasted gold and a little rustic around the edges. Then remove from pan and sit aside until they're needed.
Step 2: Sealed and ready to use subs
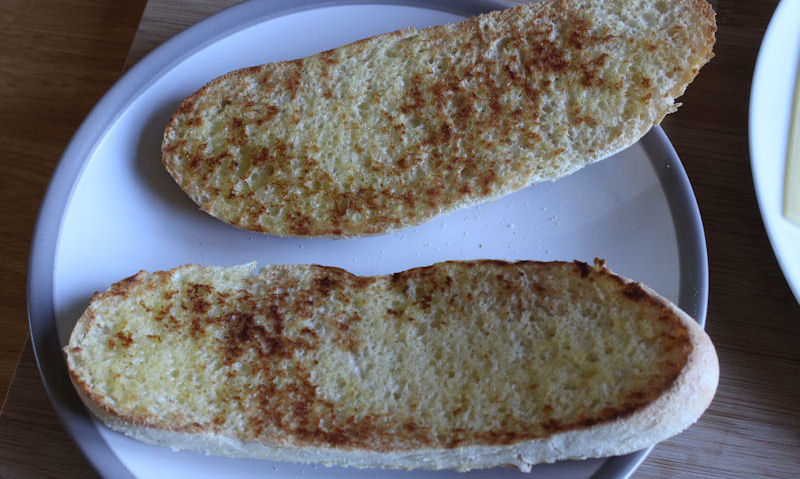
We've now created a sort of seal that will prevent moisture escaping from the freshly cooked hot beef and cheese into the bread, preventing a soggy bread.
Step 3: Frying Beef Strips in Grill
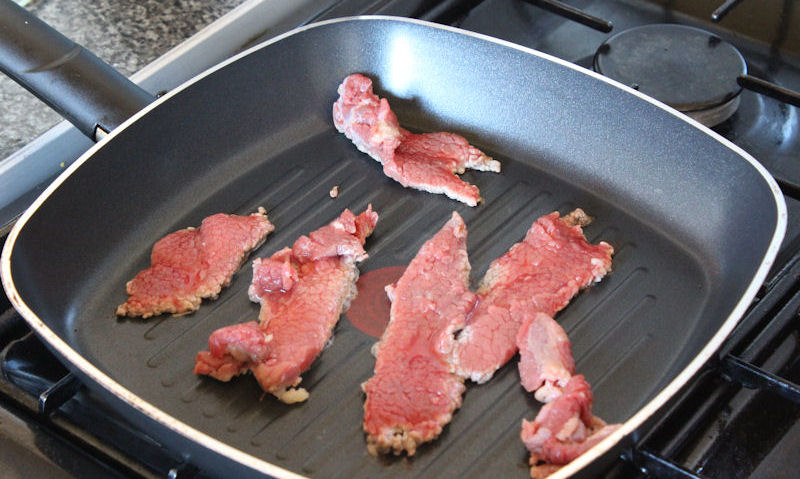
Cut seven to ten beef strips - 1mm to 2mm thick - directly off a beef joint and season with salt and ground pepper. Bring your pan up to a high heat with a tablespoon of olive oil, and cook for up to 5 minutes, turning strips until browned.
Step 4: Stack Beef into Corner
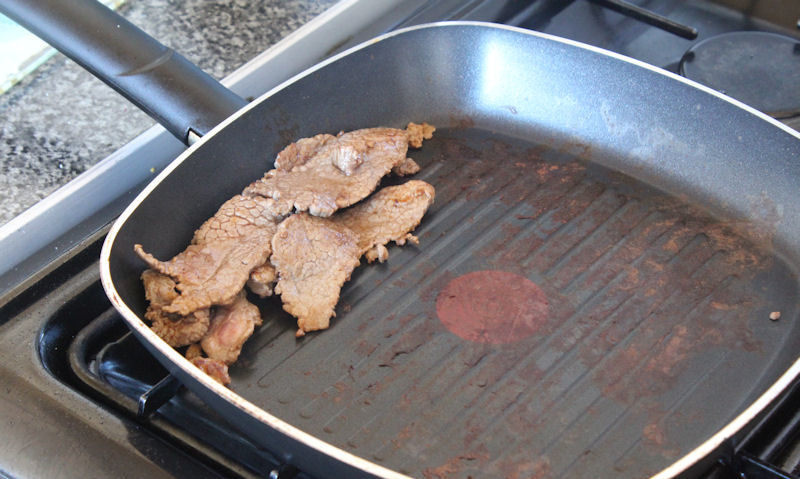
After 5 minutes of cooking or until the strips have browned, stack up the beef strips up against a corner of your pan. its vital you create a shape similar to that of your sub roll so it all fits in within the boundaries of the sub sandwich.
Step 5: Melt the Cheddar Cheese
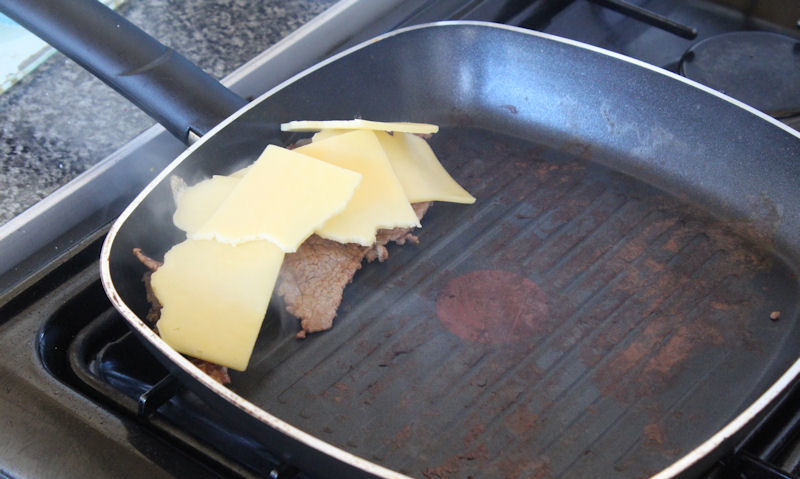
Take two slices of Cheddar cheese - or cut thin from a block - and quickly throw them on your beef strips before they continue to cook to long. Make sure to slice the cheese down to fit on the beef strips so it keeps within the boundary of the sub roll.
Step 6: Make a Lid to Melt Cheese
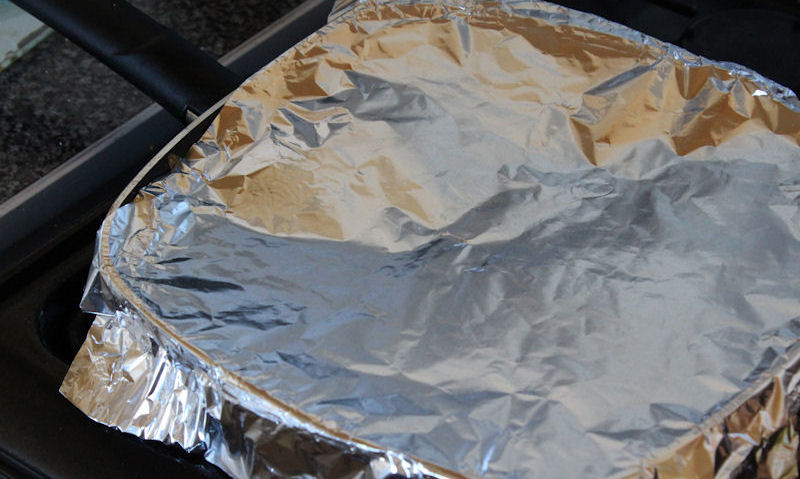
To help things along, cover your grill pan with tin foil to trap the heat and speed up the cheese melting process. If you wait to long for the cheese to melt the longer the beef will cook and become chewy - that you don't want. At this stage you must be careful not to burn your hands so use a dish towel.
Step 7: Pile on Beef and Cheese On Sub
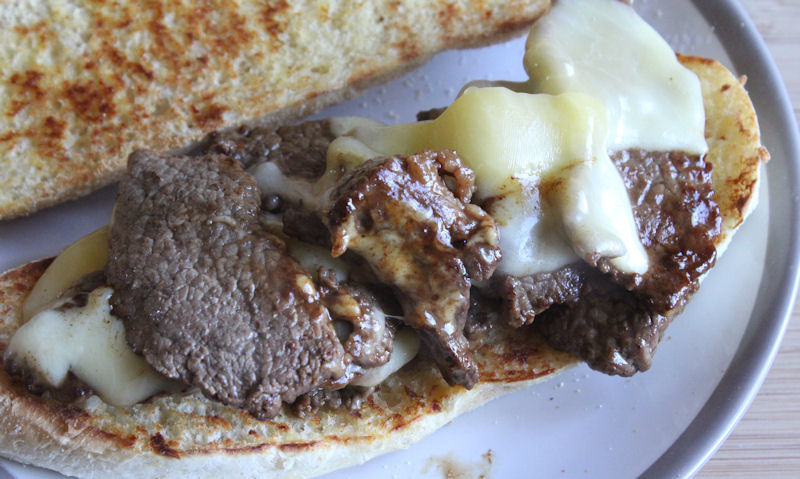
See, the benefit of piling the beef strips and cheese in the pan creates a big sticky pile that will hold its shape and slide onto your sub roll with ease. Well, in theory this should work, but if not just use a fork to get it all in the roll making little mess as you can.
Step 8: Pour on the Honey Mustard Dressing
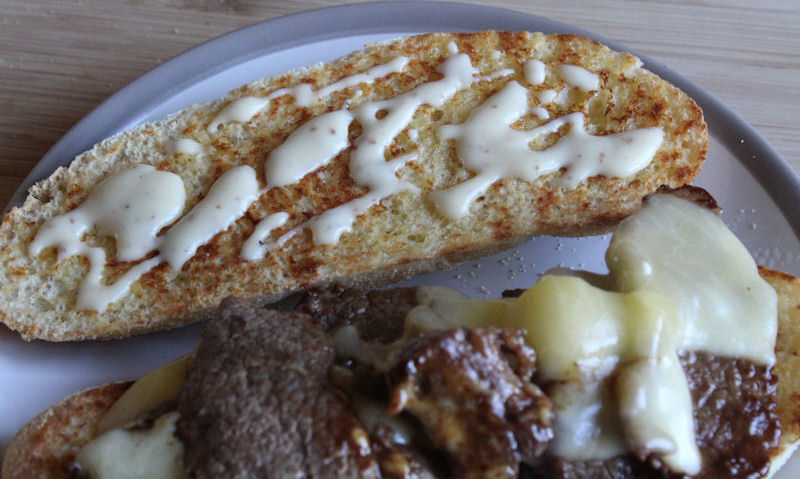
Take a generous spoonful of honey and mustard dressing and on pour on your top side sub, either with a tablespoon but if you like just pour directly from the bottle - less washing up then.
Step 9: Add Green Pepper
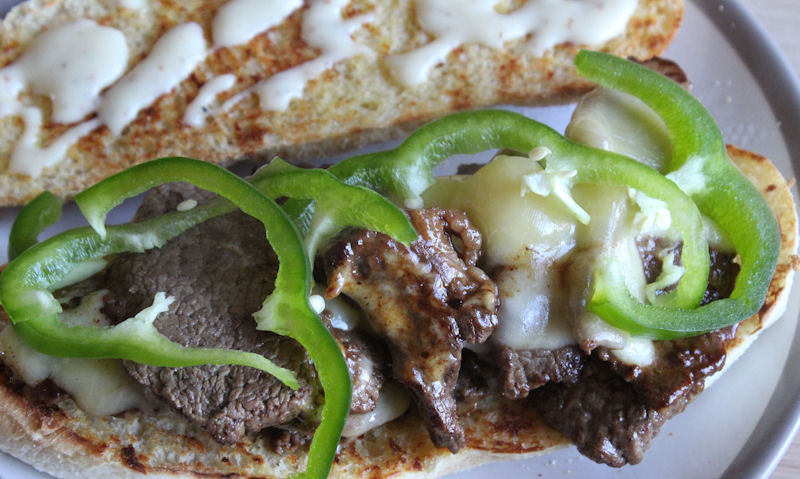
Cut 2 thick slices of green pepper, and cut again so your left with 4 quarter slices in total, positioning the pepper slices directly onto the beef and cheese.
Step 10: Add Red Onion
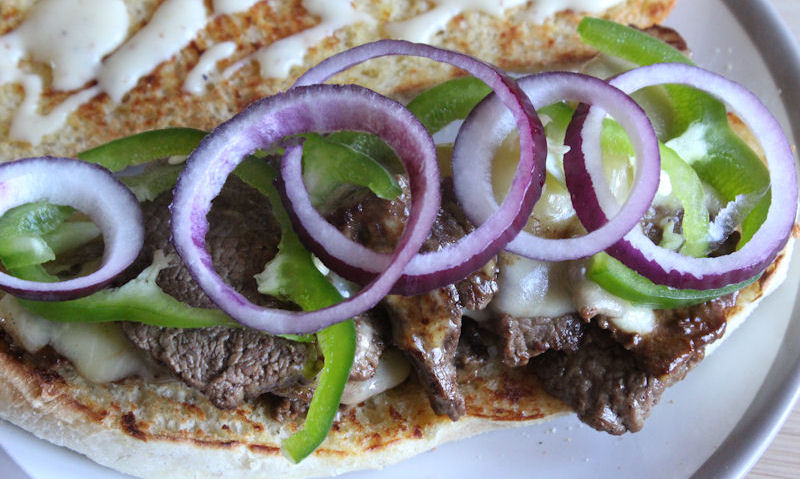
To complete this steak cheese sub, slice 2 onion rings and cut again to create four quarters. This should be all the onion you need, but use as much as you like.
Step 11: Close Up Sub and Serve
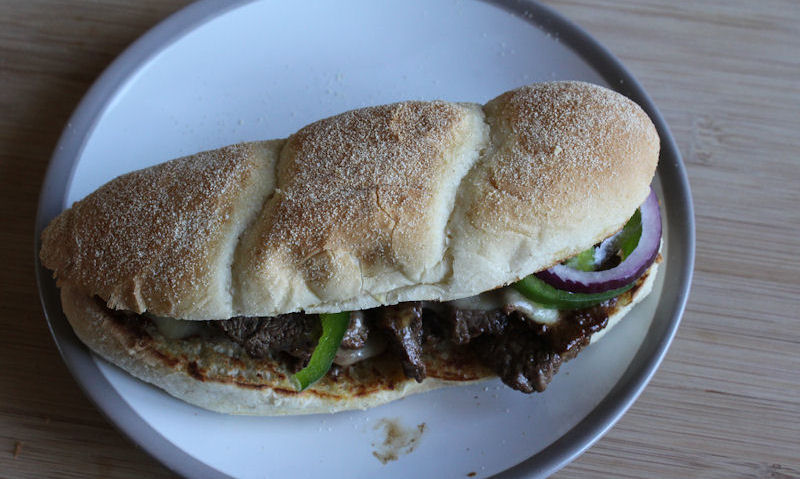
Before you get stuck into this delicious sub, be sure to cut in half so its easier to eat and serve on plate that should act as a catcher for the mess your about to make.
Assembled and Ready to Eat
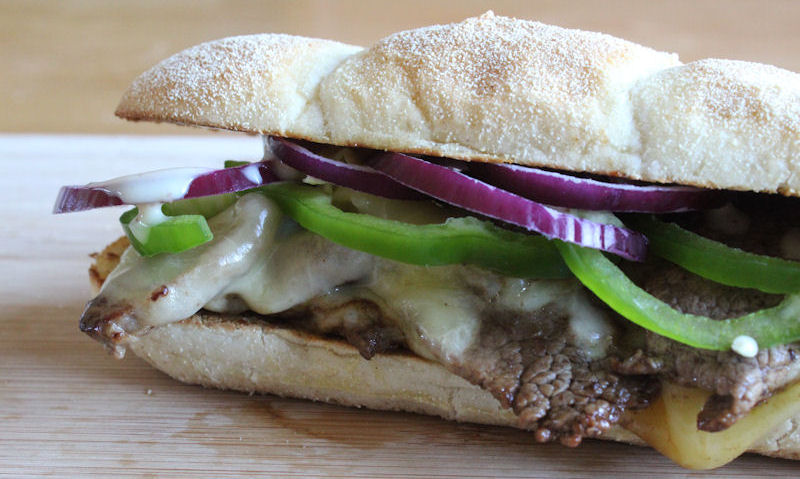
And here it is in all its glory, the assembled sandwich with a high pile of beef, melted cheese and a salad consisting of green peppers and red onion - enjoy.